Depending on the animation environment, every “frame” is drawn by replacing the entirety of a frame with new pixels. In other words, there is typically no reference within the animation environment to any pixel information from the previous frame/s. Instead, if any data from a previous frame needs to referenced again, the animator/developer needs to create a specific reference to include that previous data in future frames.
Depending on the environment, this can be accomplished in various ways. As an example in P5.js and Processing these programs build visuals by creating a canvas where everything is composited together, UNLESS the developer adds a background() function, which then overlays the background with a color or image of the developers choosing.
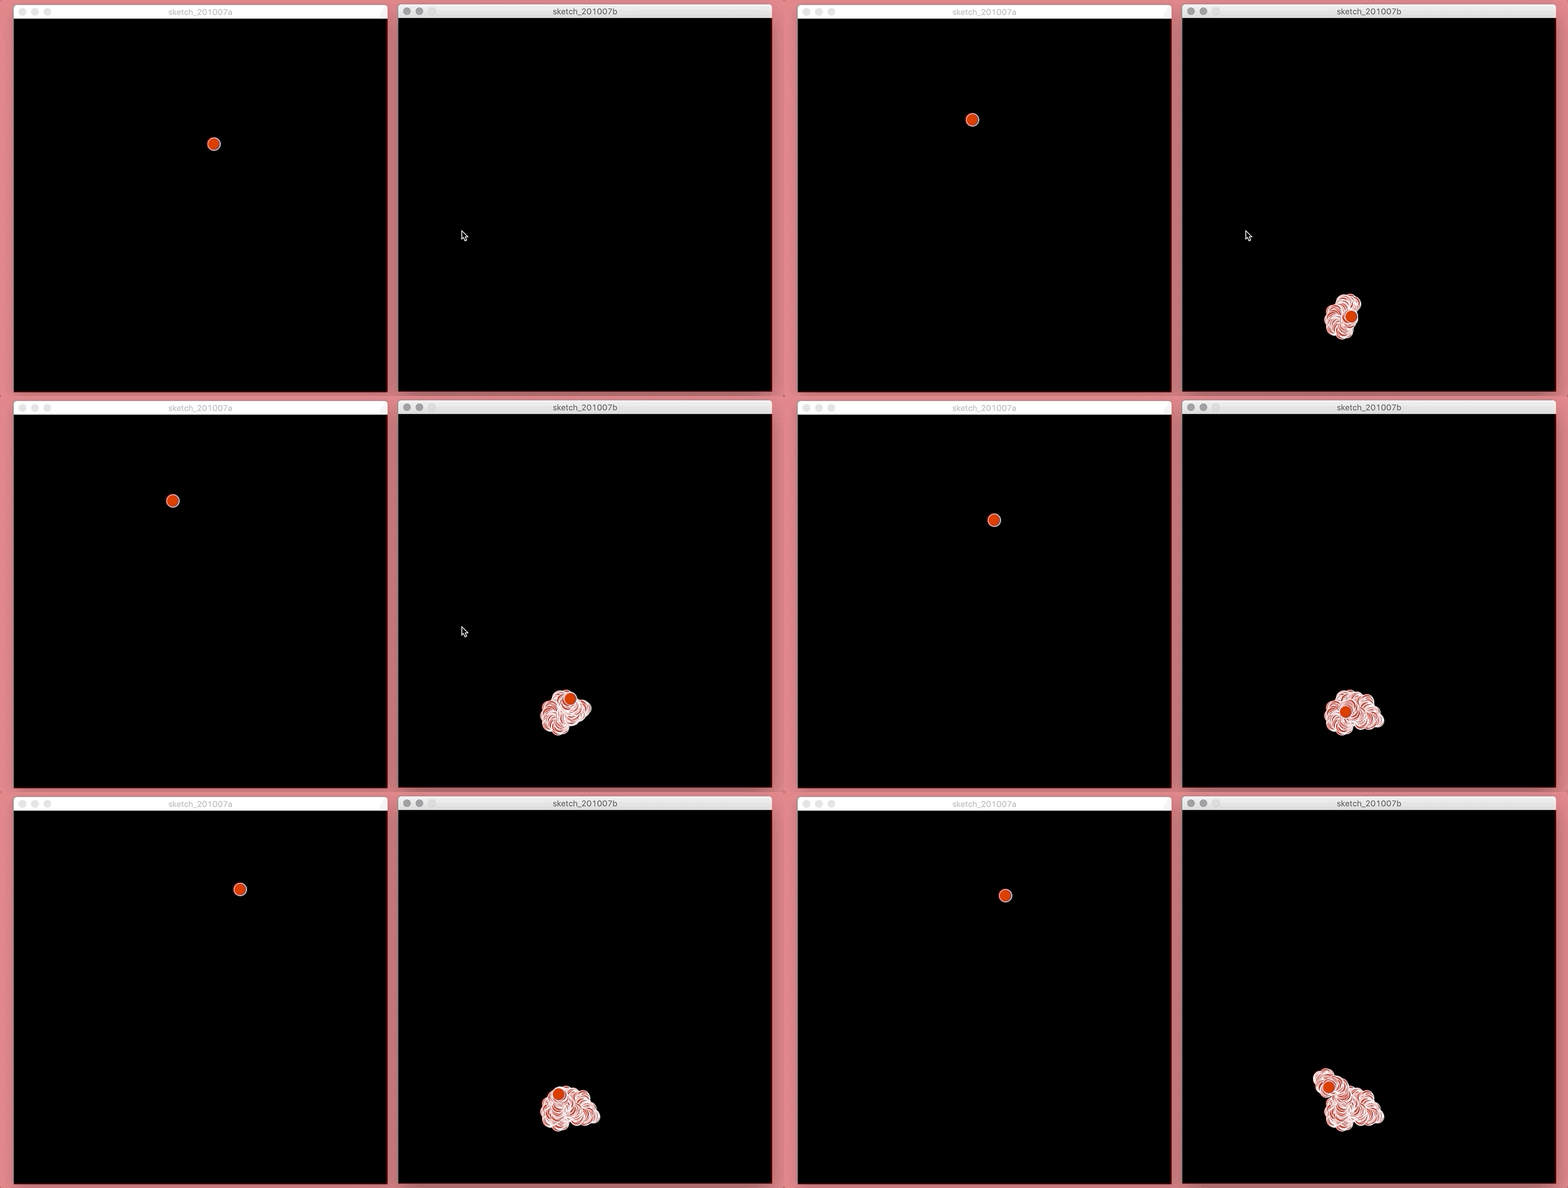
If instead the animator/developer wants to create a fading effect, where the previous frame/s are present, but fade over time. They can include an alpha value in the background function (background( red, green, blue, alpha)), which will cause the previous frames to “fade out” over time (dependent on the alpha value).
This approach by P5 and Processing create an easy way for animators/developers to create an animation reference to previous frames. The problem with this approach is that you cannot choose which elements or individual objects include a reference to previous frames, and which do not. Instead, it is a take it all or nothing approach.
In TouchDesigner, each frame is always drawn “freshly”. Unlike P5 or Processing, developers/animators need to specifically create a reference to previous frames or objects if they want to generate animations with “history” or reference to these previous frames/objects.
In TouchDesigner, this is accomplished through the Feedback TOP.
Feedback Tutorial Video
The following video does a really nice job of introducing this relationship between feedback and animation within TouchDesigner.
Work-Thru of Demo Video
The video admittedly moves quite quick for a beginner tutorial. So the following breaks down these steps a bit further.
1. Add a Circle Top
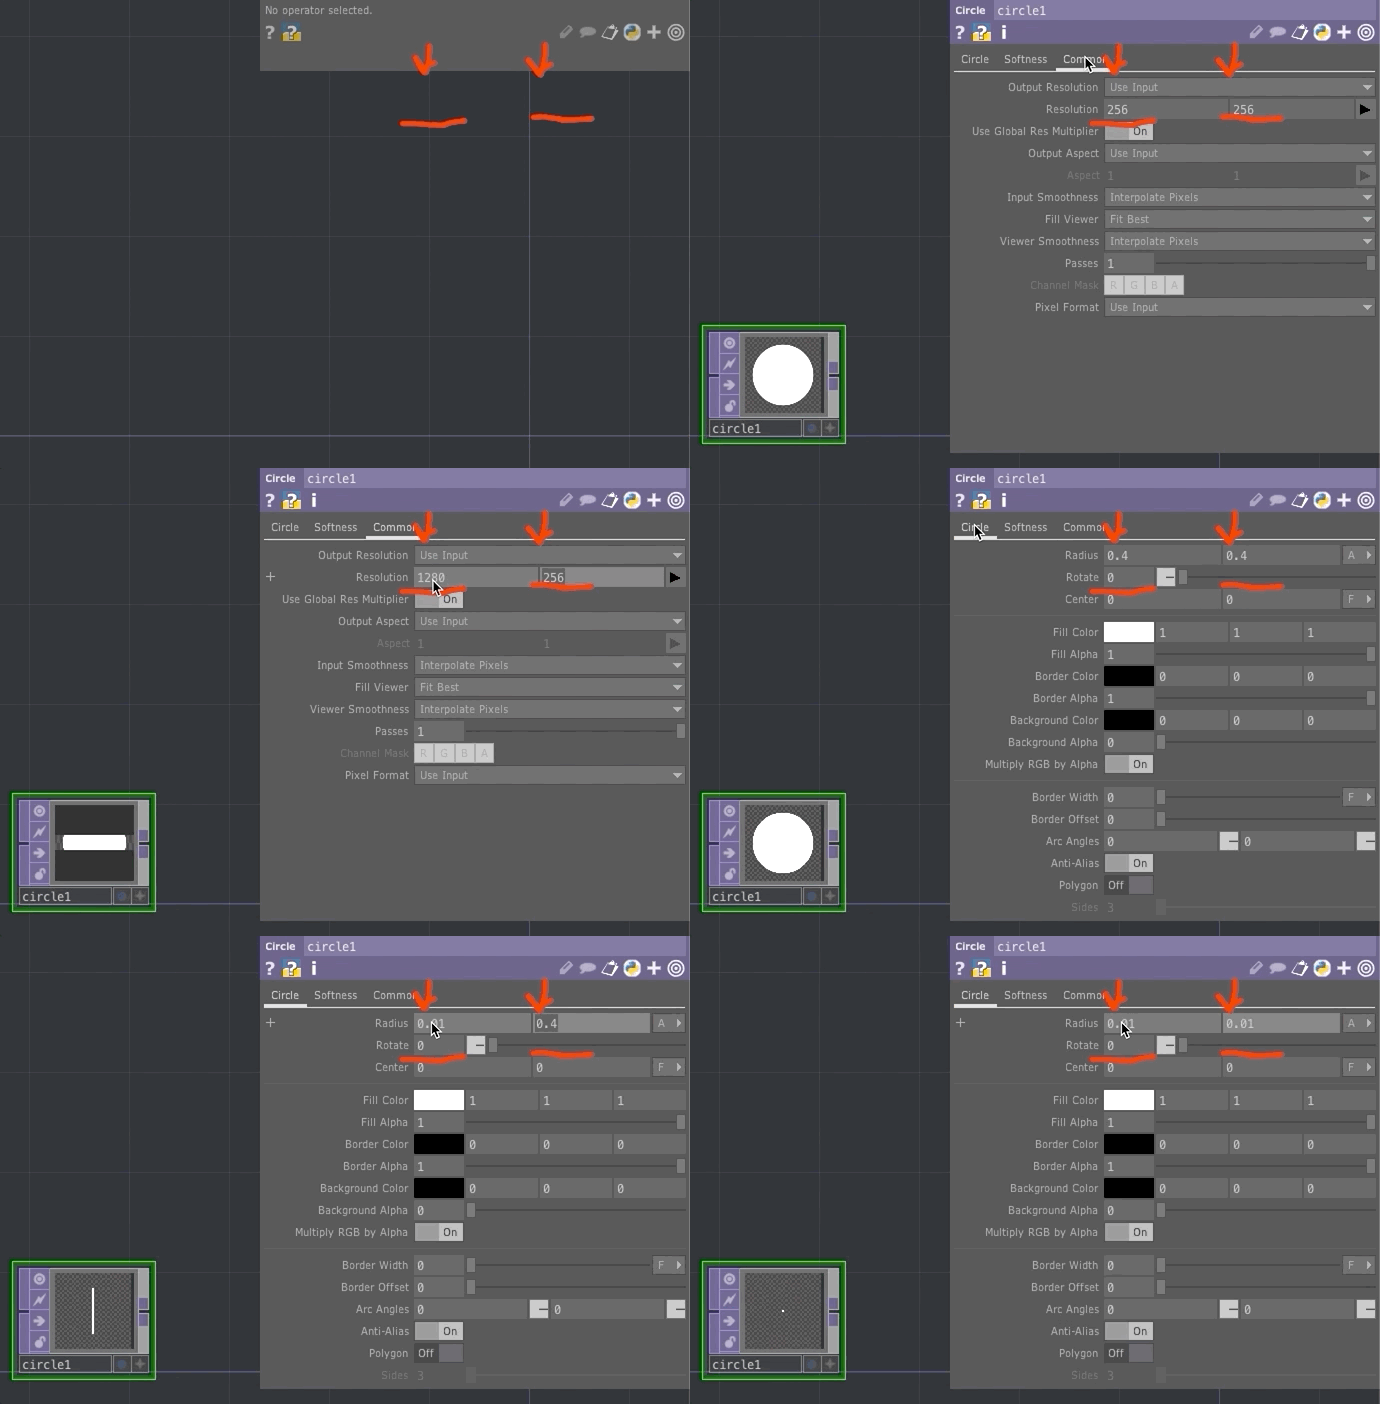
- Add a circle TOP.
- Then select the “common” tab in the parameter window.
- Change the resolution to 1280px for both dimensions.
- Go back to the “Circle” tab in parameters, and change the radius to
0.01for both dimensions.
2. Add a Noice CHOP
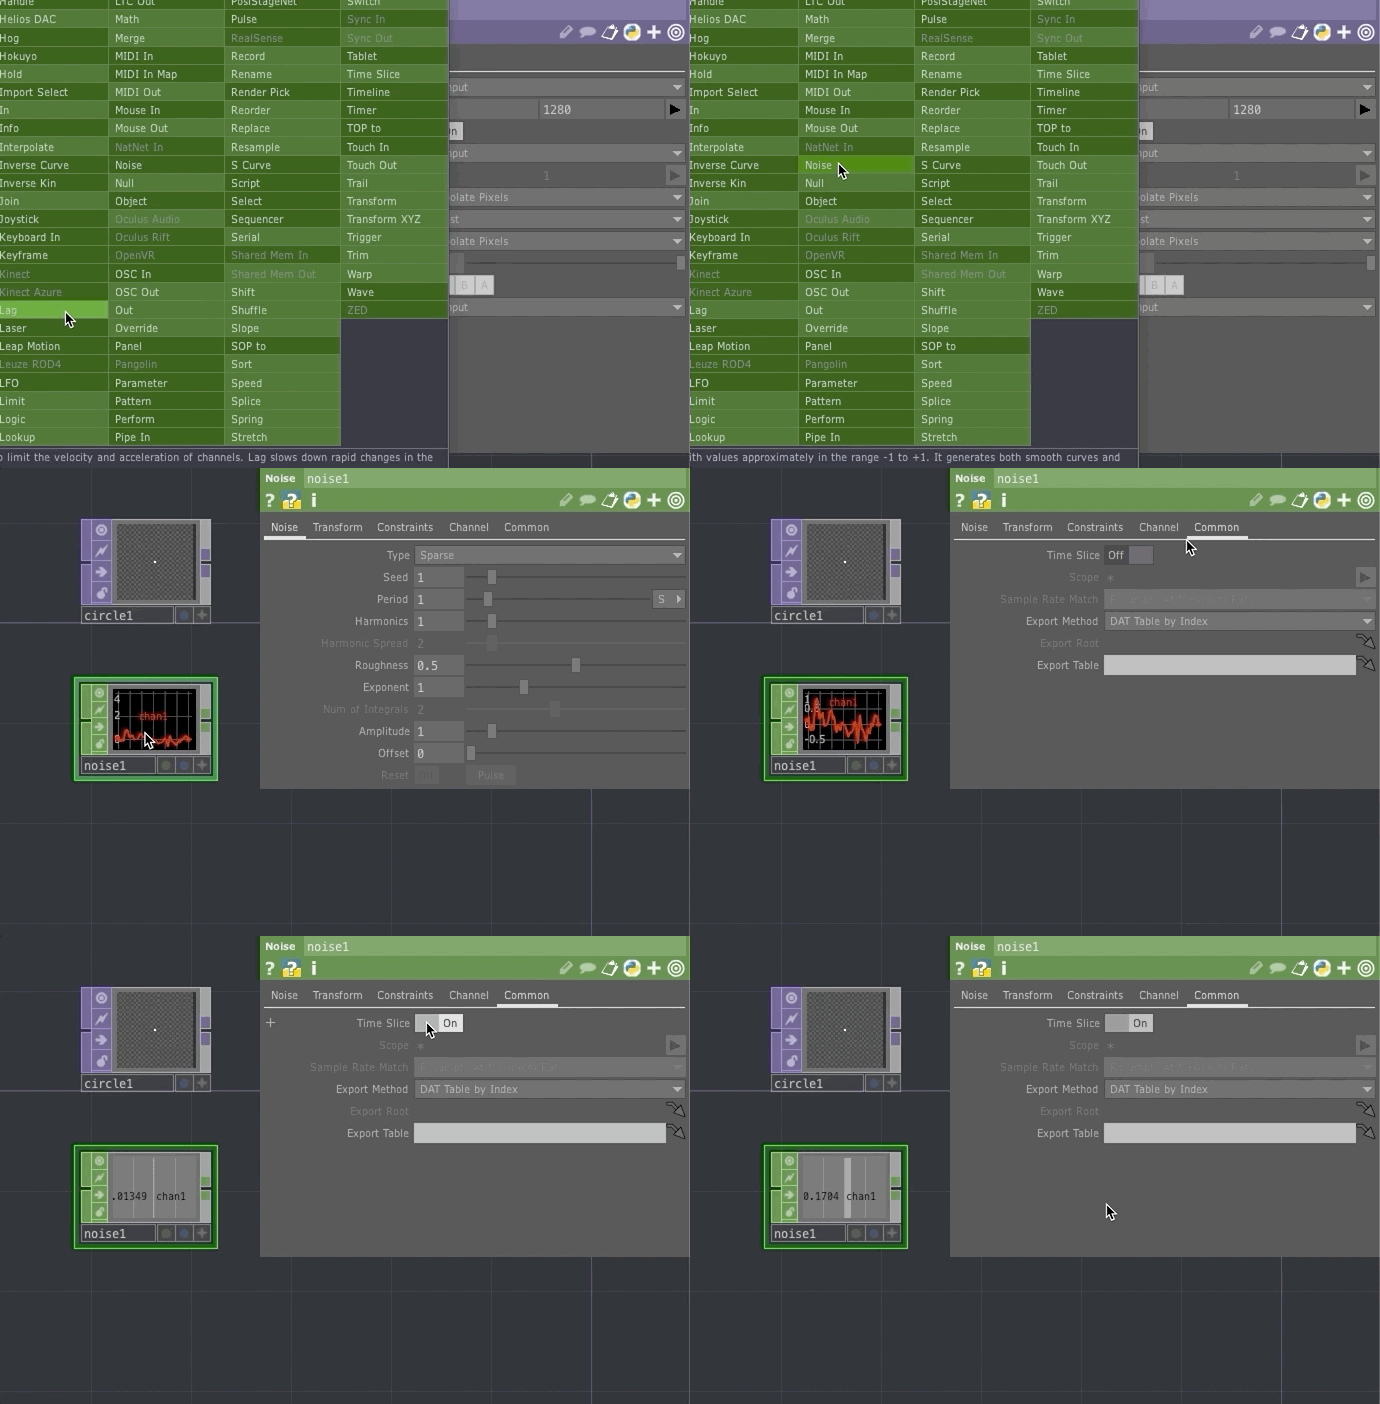
- Add a Noise CHOP
- Under the “common” tab in the parameter window, change “Time Slice” to
On.- { NOTE: } Time Slicing is a feature in TouchDesigner that keeps your CHOP channels smooth, even when your overall frame rate goes down. This keeps your overall animation smoother and more accurate, and helps keep your audio from popping when your frame rate drops.
3. Reduce the noise CHOP’s range
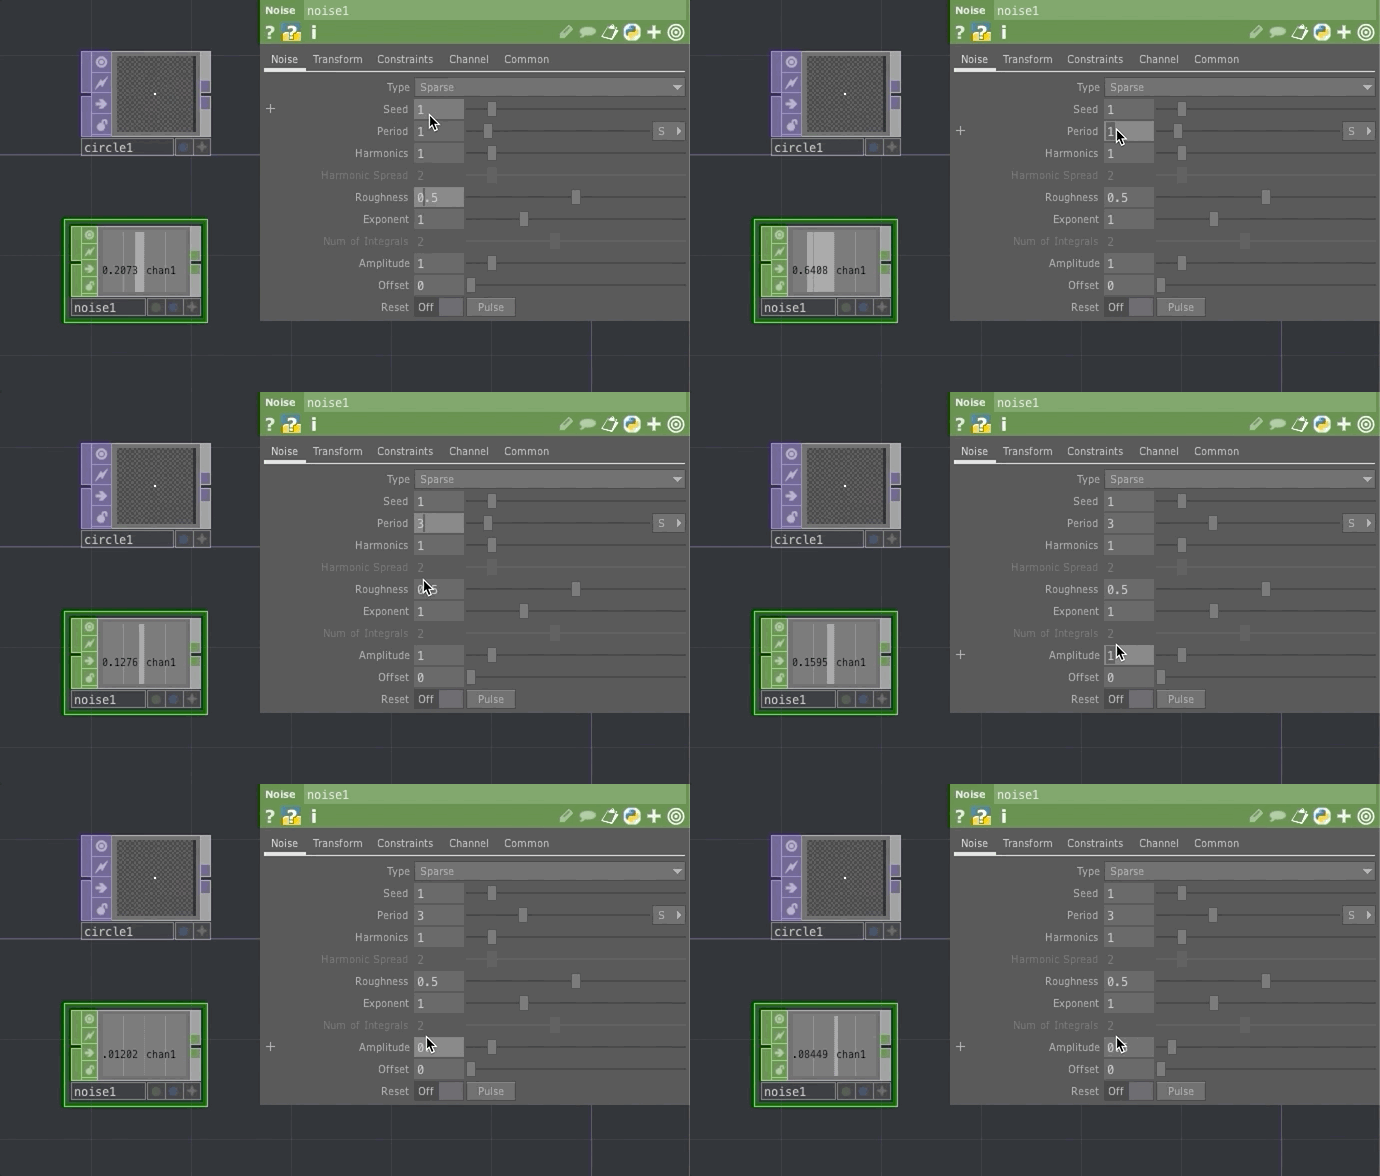
- Navigate back to the “noise” tab in the parameter window of the
noise1CHOP. - Reduce the range of the noise chop by changing the
Periodparameter to3and theAmplitudeparameter to0.5.
4. Copy the noise1 CHOP and alter the values
- Duplicate the
noise1CHOP by copying and pasting. - Then alter the
Seedparameter value so they are “out of phase” with each other.
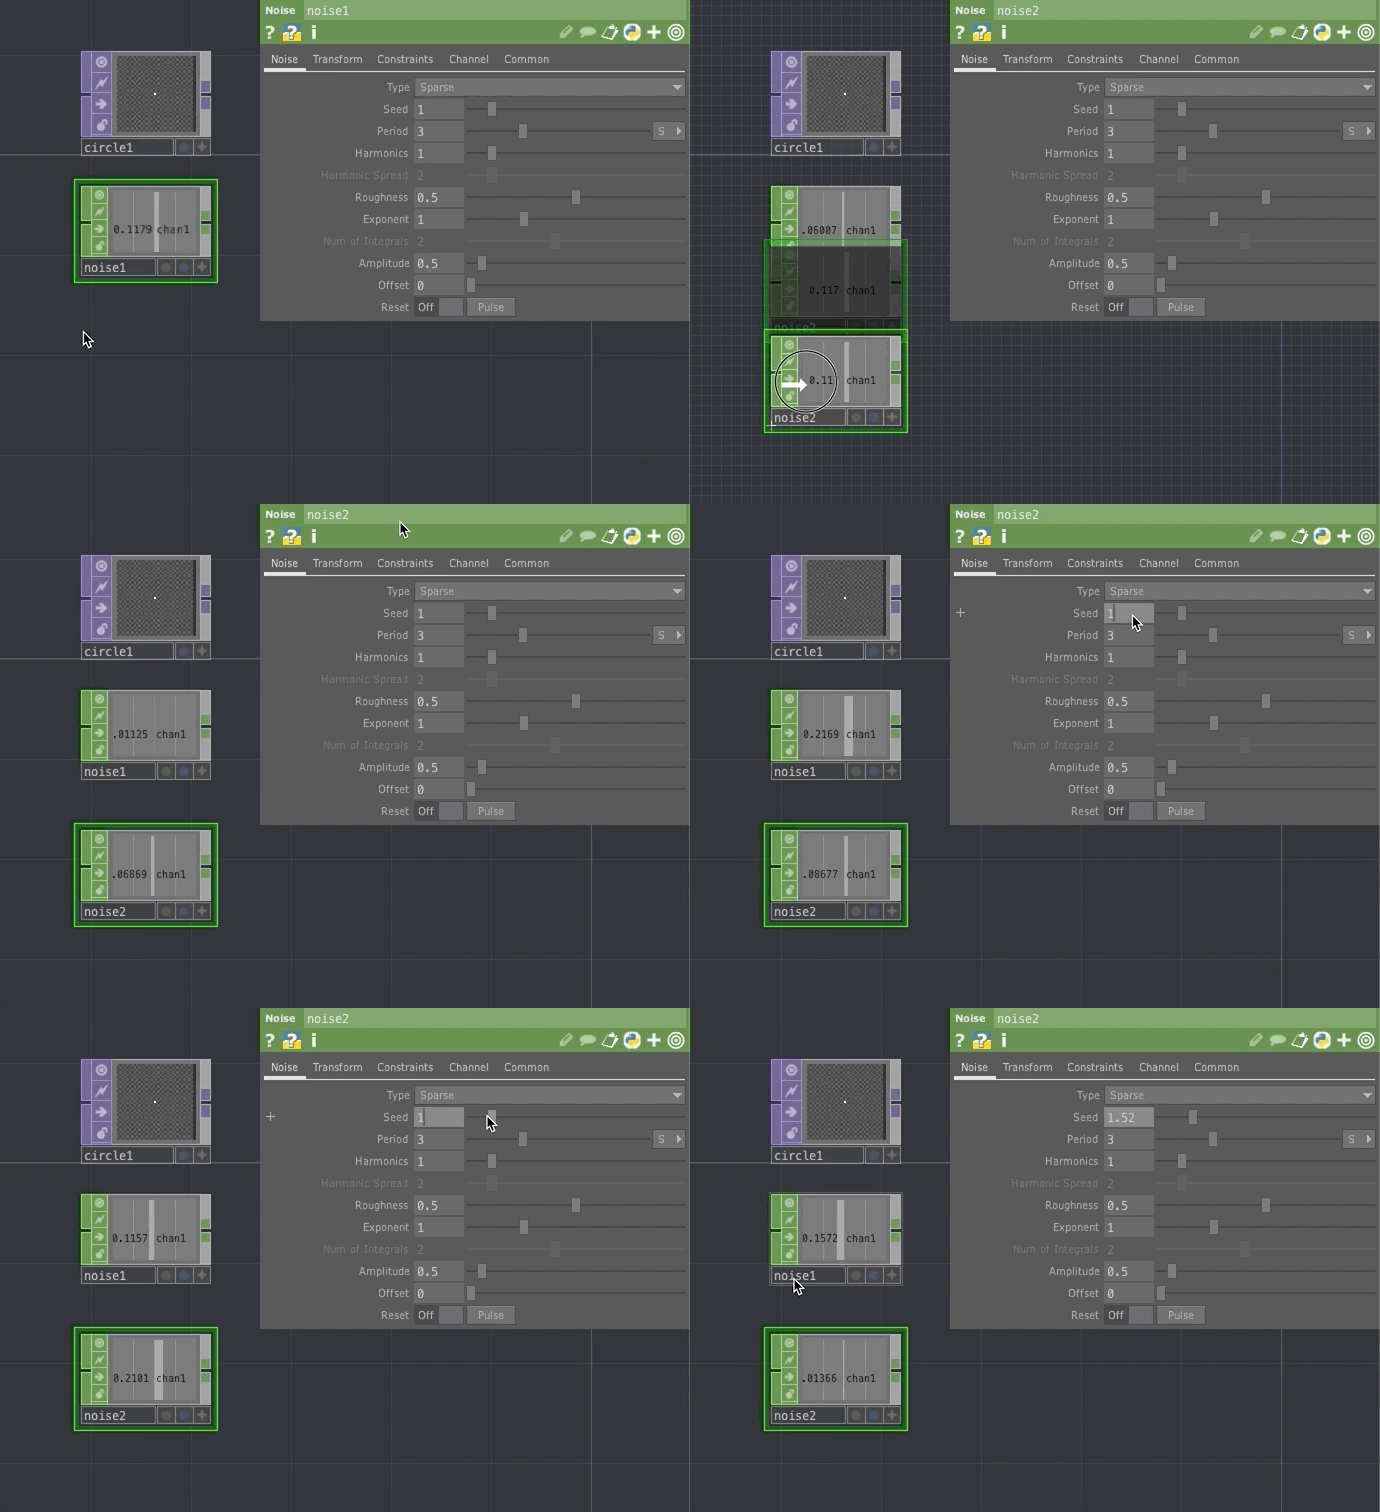
5. Apply Noise CHOP value to Circle TOP
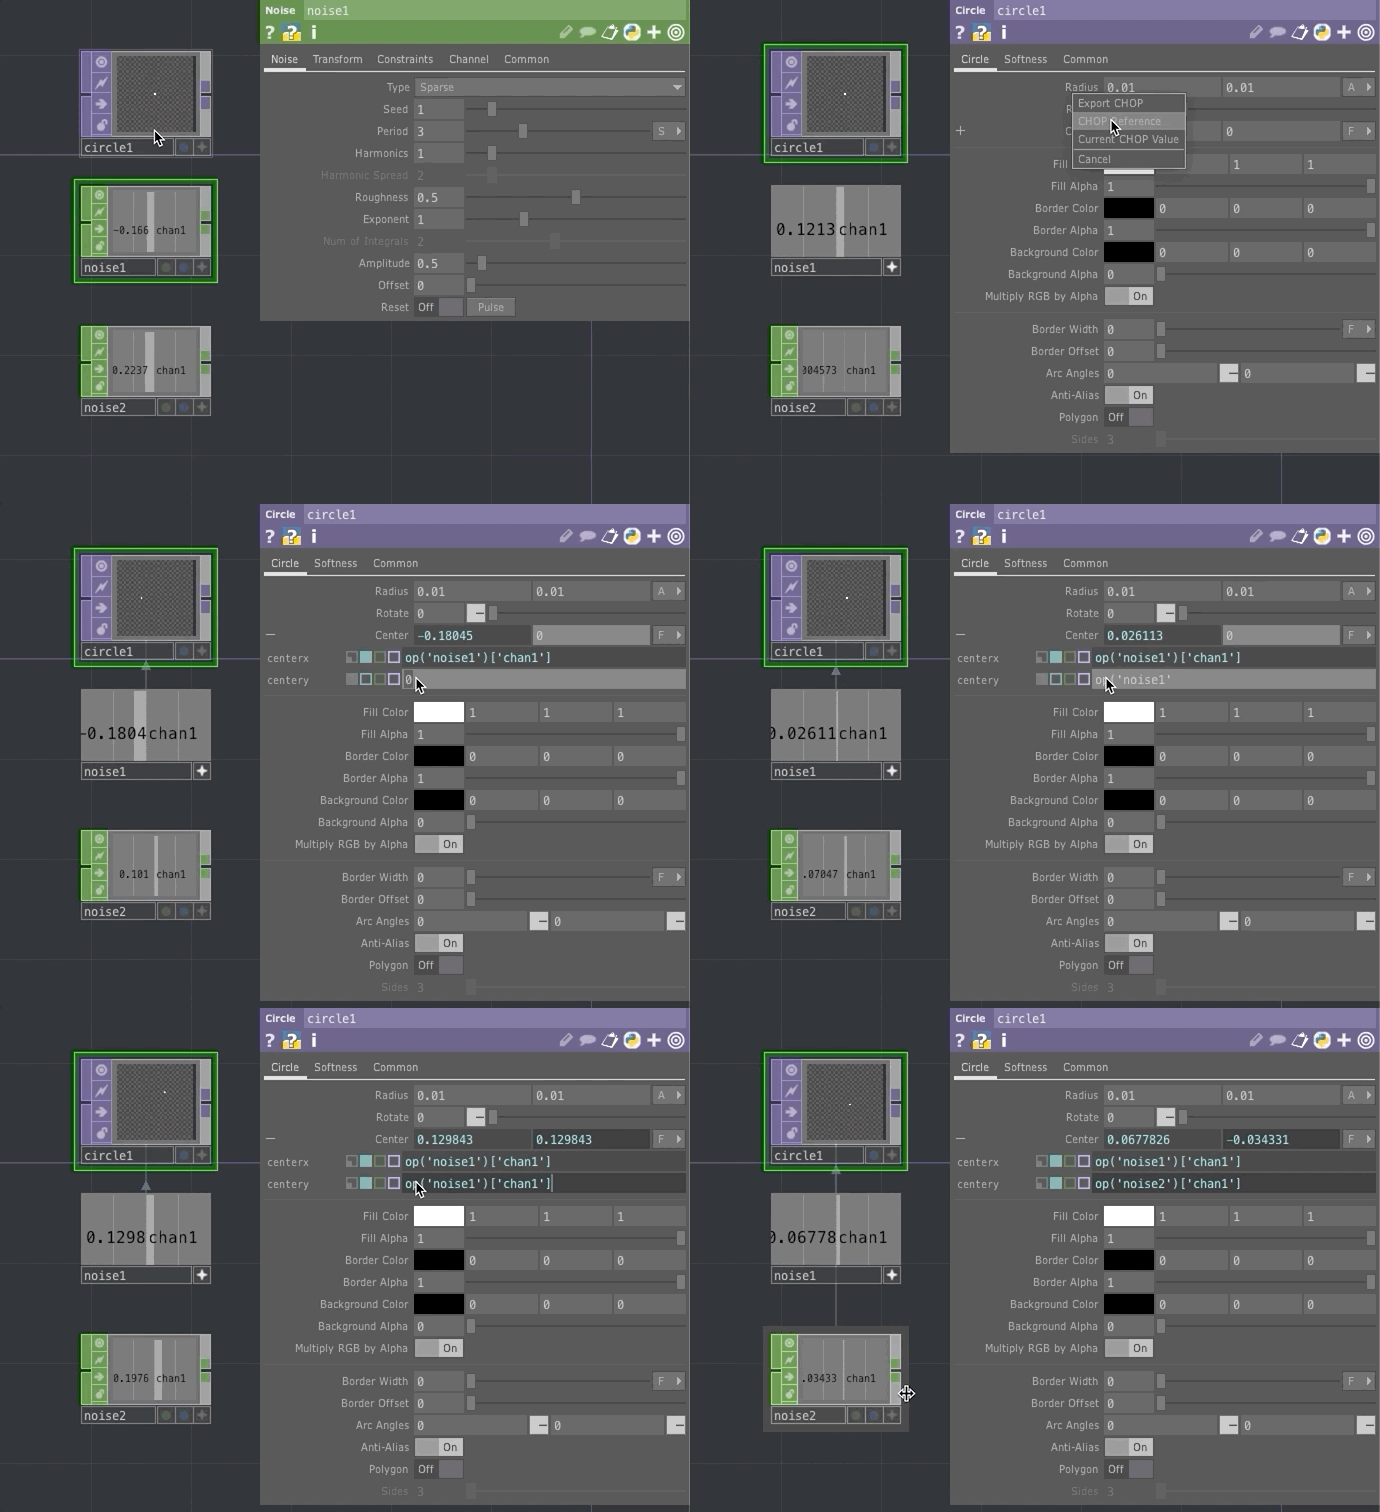
- Apply the values of the Noise CHOP’s to the Circle TOP’s
- You can accomplish this 1 of 2 ways.
- Drag & Drop
- Select the “Viewer Active” switch in the desired noise CHOP.
- Then drag the CHOP to the ‘centerx’ parameter value for the Circle TOP.
- Finally select the “CHOP Reference” option.
- This automatically creates a Python reference expression for you.
- Type in the Python reference for that desired CHOP channel
- You can also directly type in the Python reference to the CHOP and channel.
- As an example, for the ‘centery’ parameter value, type
op('noise2')[chan1] - This tells TD to grab the
noise2operator, and from its channel array, selectchan1.
- Drag & Drop
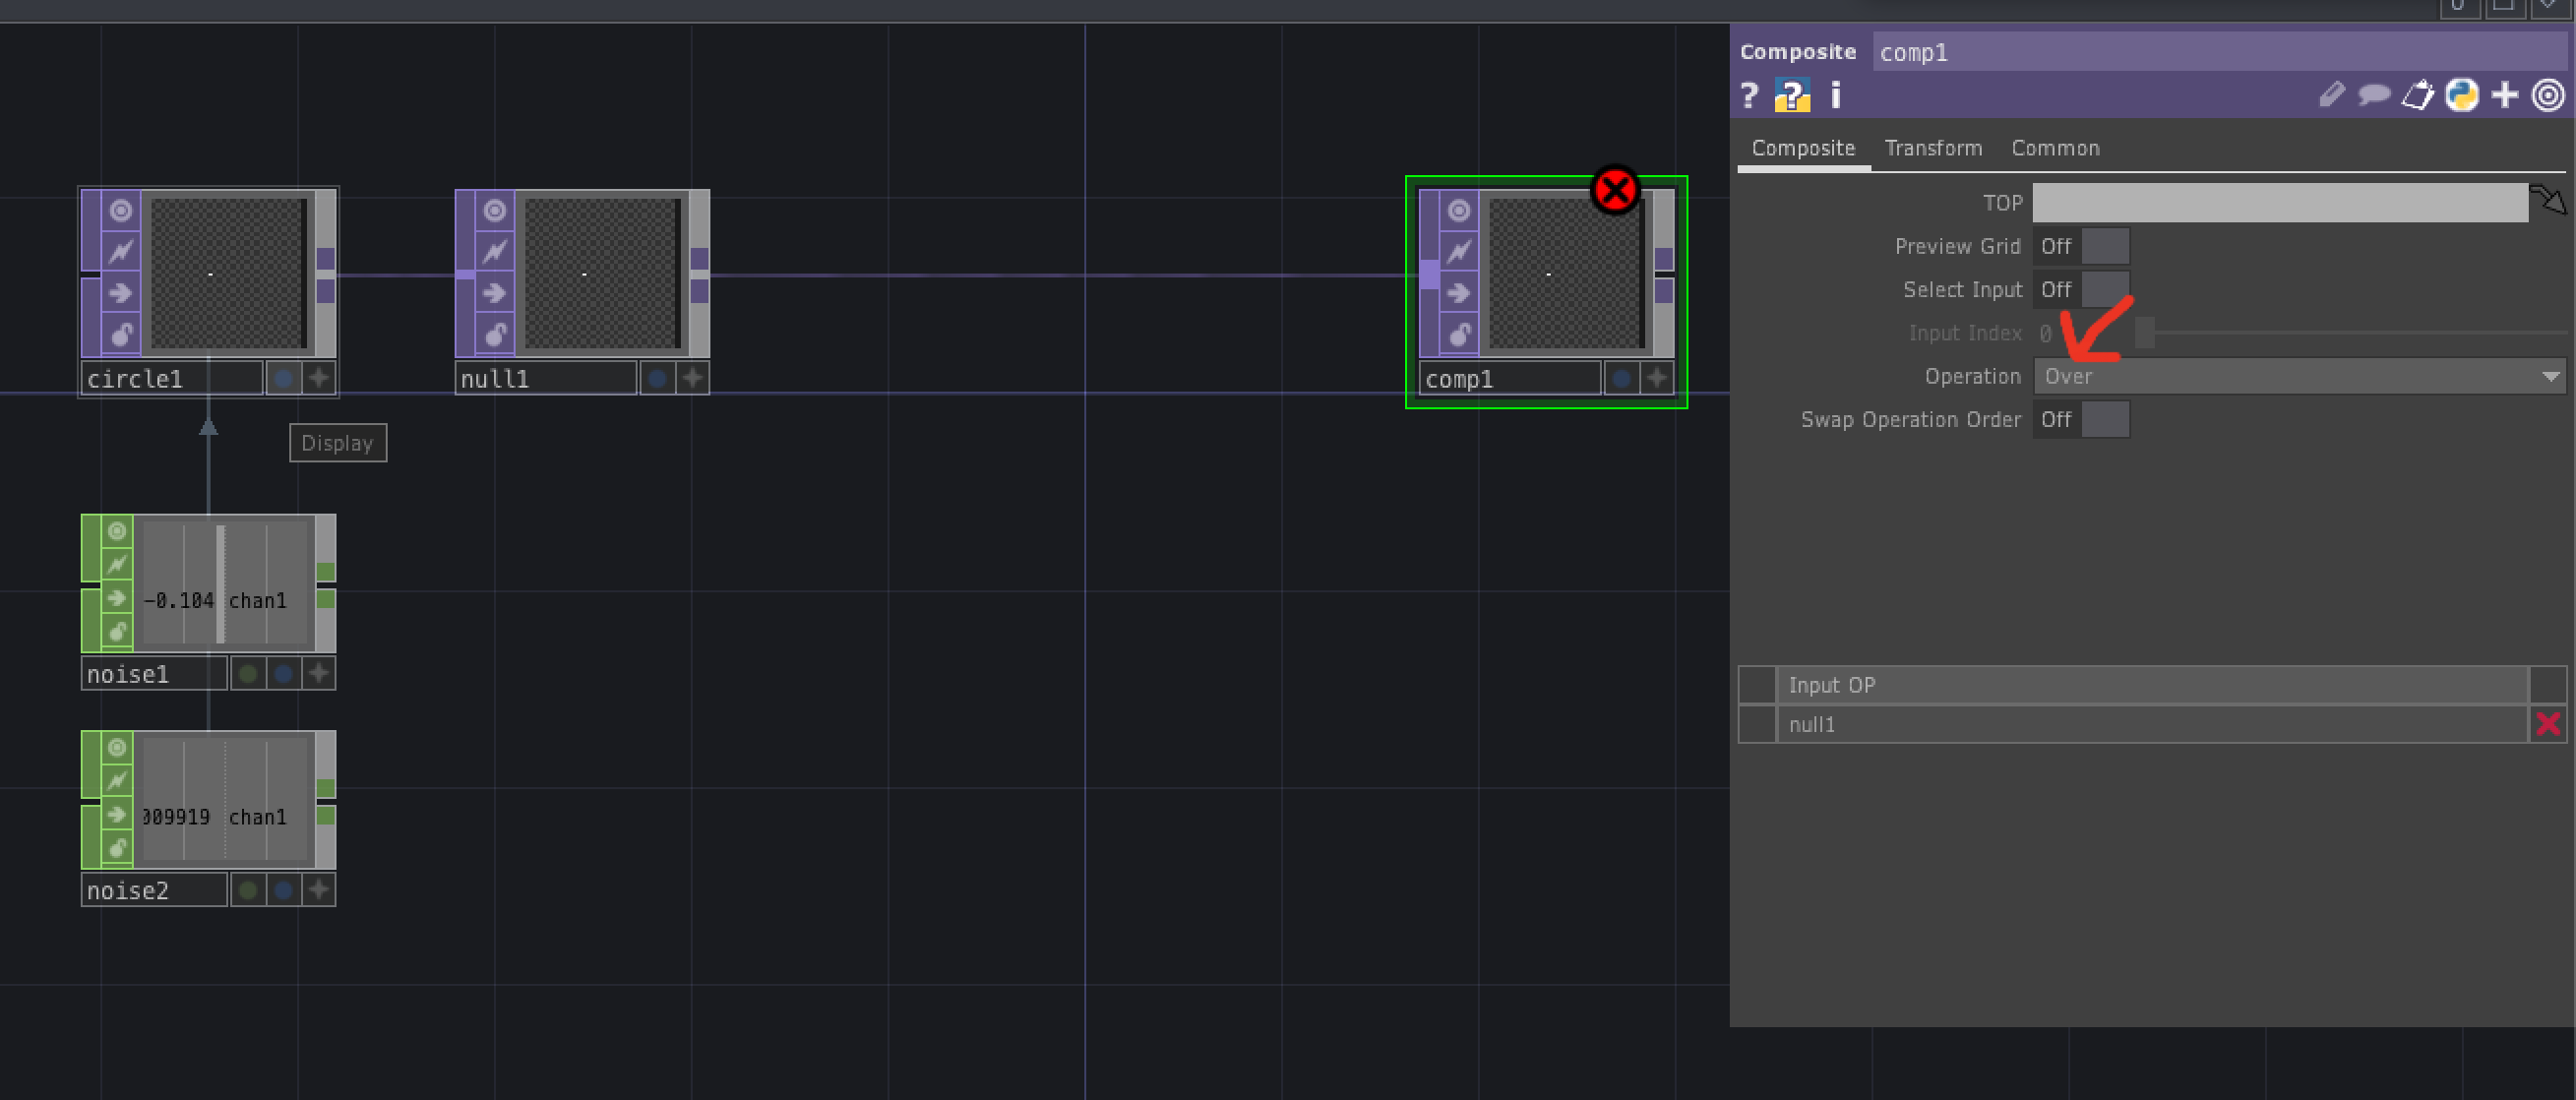
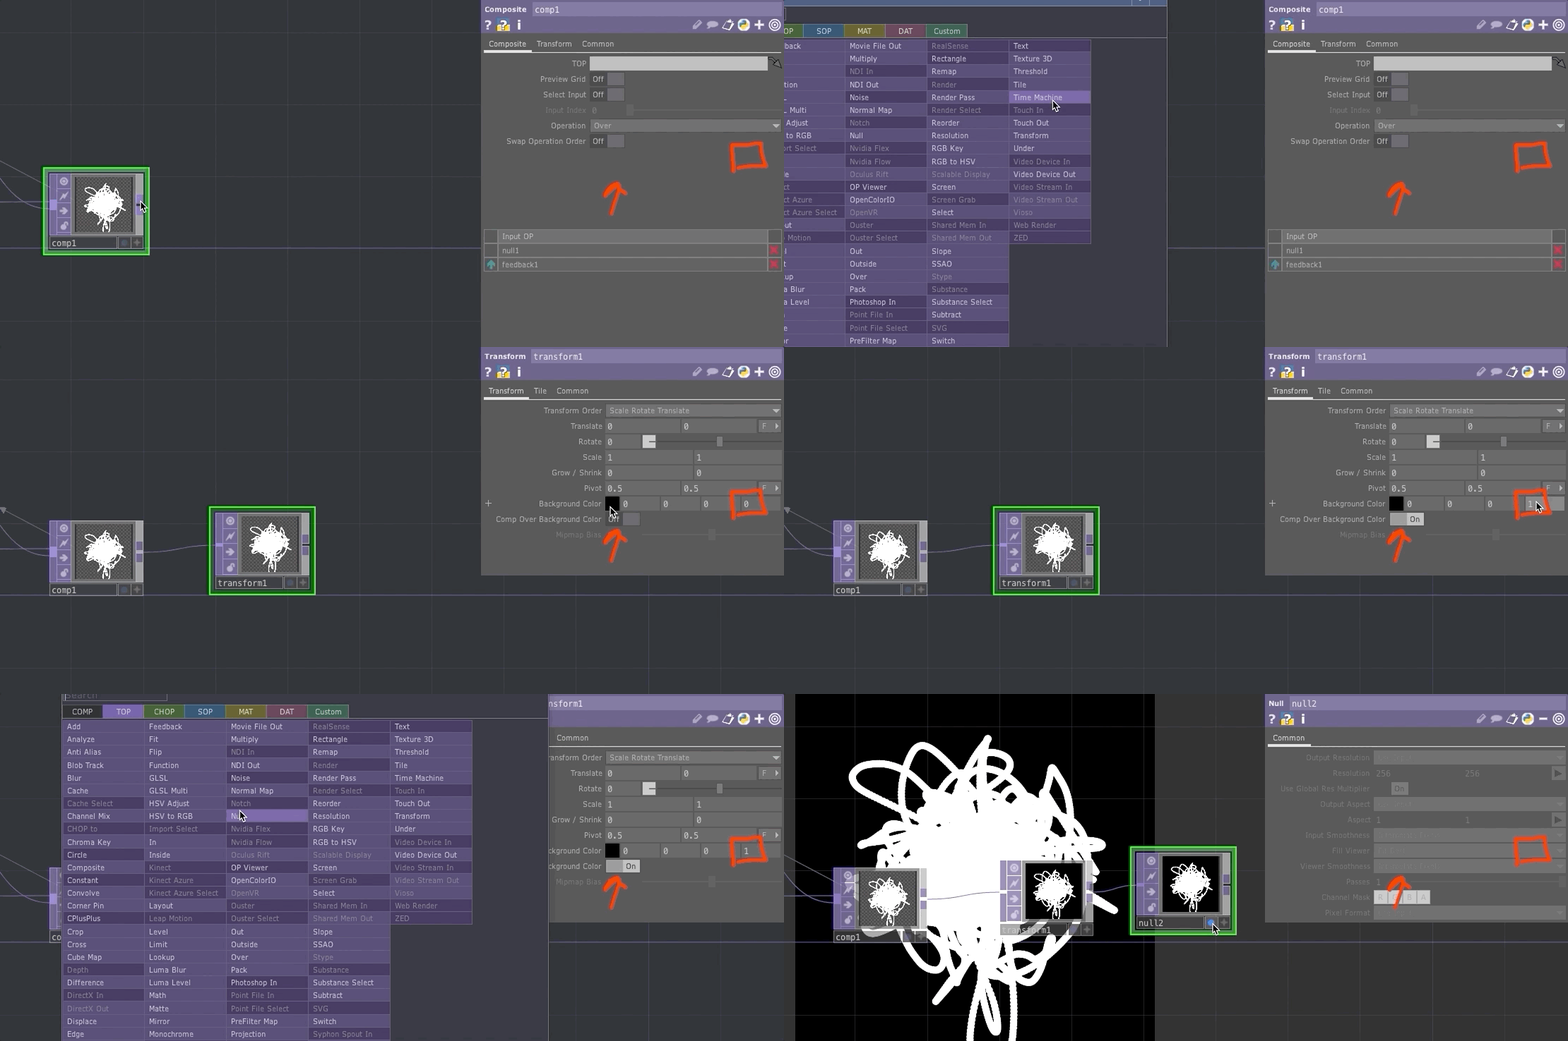
6. Add Null and Composite TOPs
- Add a NULL TOP out of the
circle1TOP. - Add a Composite TOP out of the
null1TOP. - Set the “Operation” parameter in the
comp1TOP to “Over”
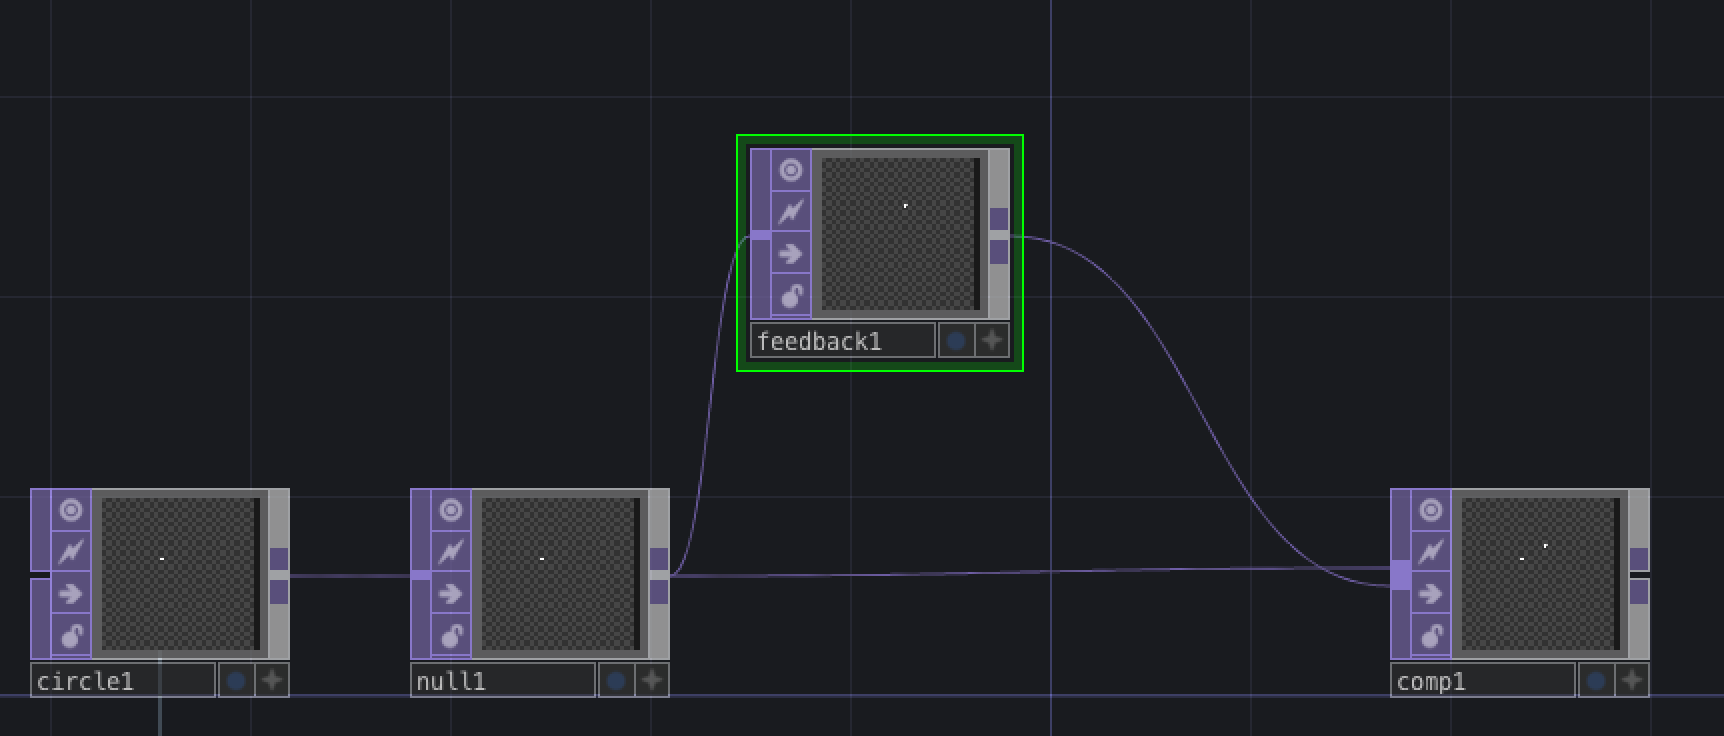
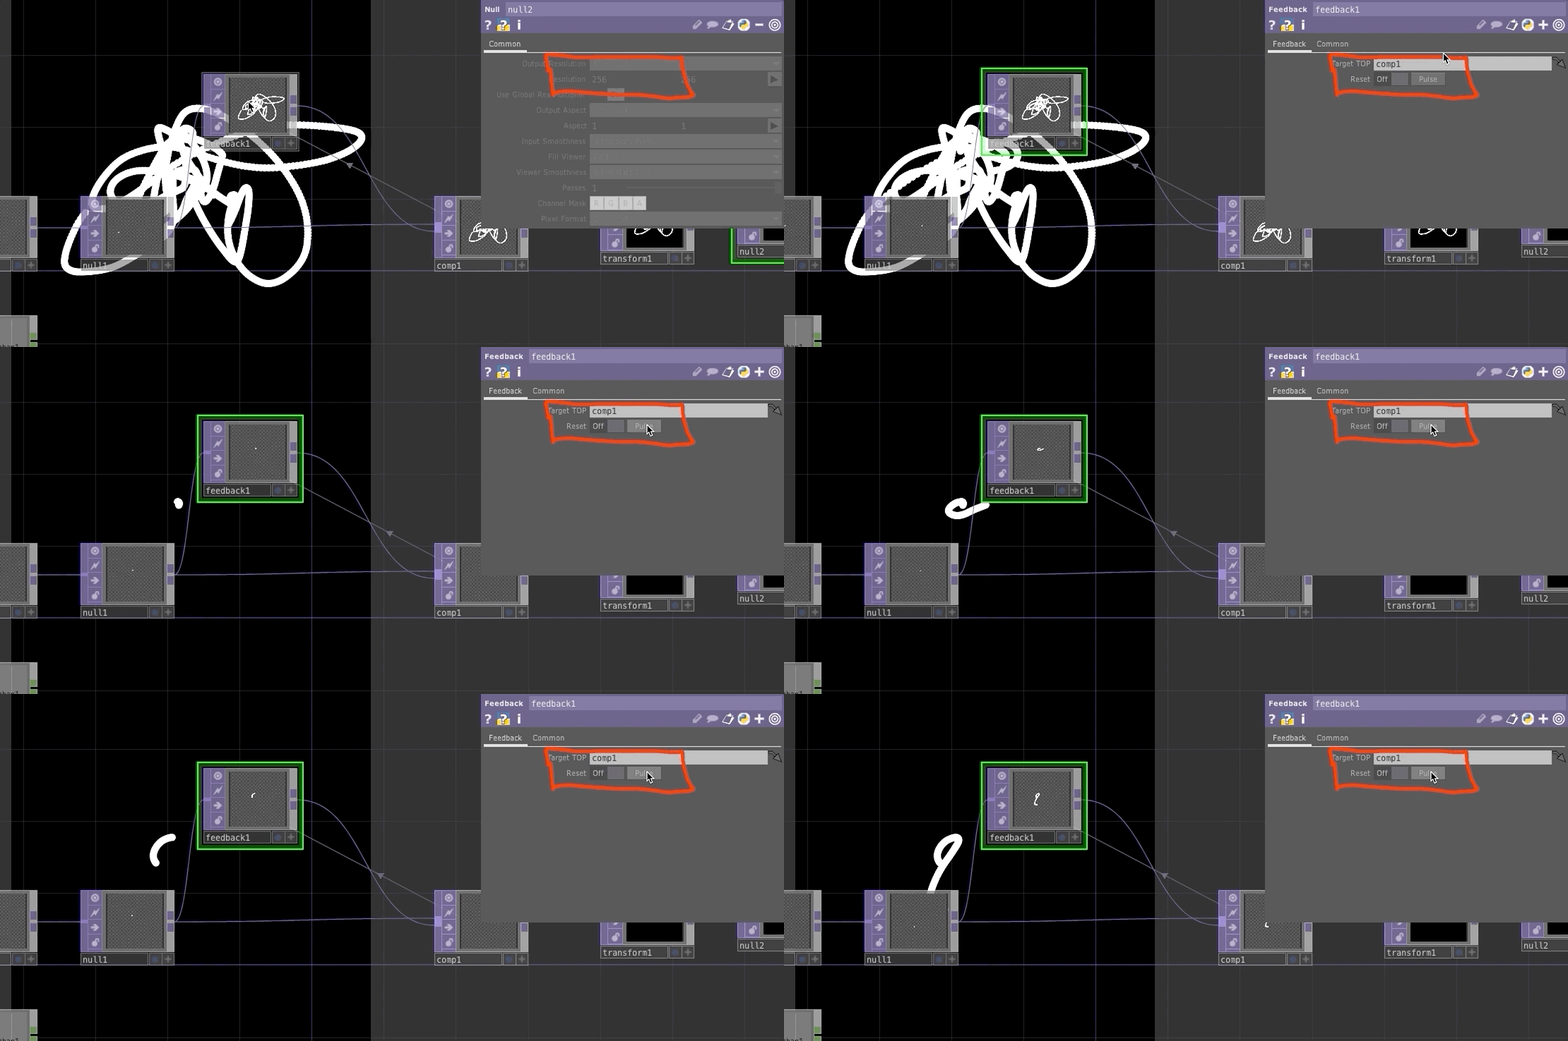
7. Add a Feedback TOP from null1
- Add a Feedback TOP from
null1 - Connect the output from
feedback1also tocomp1
8. Feed composite BACK
- Reference the output of
comp1in thefeedback1TOP - To do this, either drag the
comp1TOP onto thefeedback1TOP - OR, set the “Target TOP” parameter in the
feedback1parameter window tocomp1

9. Add a Background and End Null
- Add a Transform TOP after the
comp1TOP. - Turn the “Comp Over Background Color” parameter
ON - Then adjust the
alphachannel parameter for the background color to1 - Next, add a Null TOP
- Then turn on the viewer switch in the
null2TOP.
10. Reset the Feedback TOP
- To reset the
feedback1TOP, click the “Pulse” button in the parameter window.
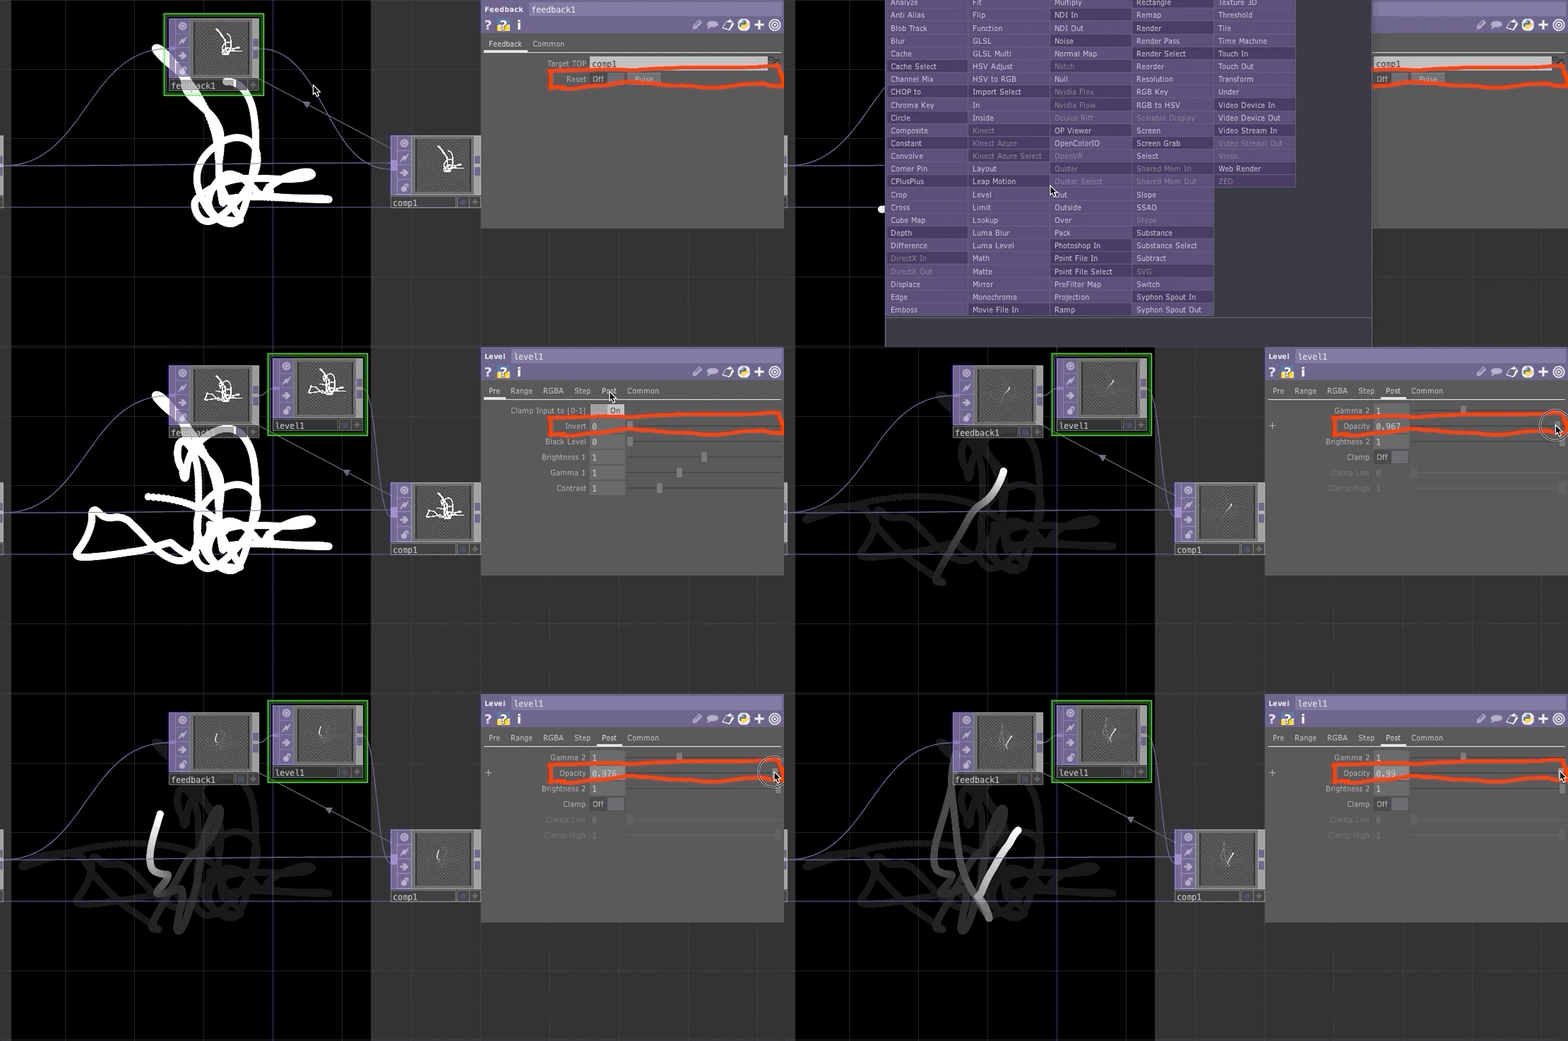
11. Add Gradual Fade with Feedback Opacity
- To add a gradual fade out of previous frames, add a Level TOP between the
feedback1andcomp1TOPs. - Then under the “Post” tab in the parameter window, lower the
Opacityparameter value. (notice how different values effect the emergent work)
Please Keep Going
Now that you have the basic network setup, please try and play with some of the other examples demo’d in the video above.